Probably one of the cutest tags that's been going around on Youtube. You basically just list beauty/hair/skin care products you love that match the colours of the rainbow plus pink and multi-coloured.
For some of the colours, I had a hard time picking between two, so I just included both ._. Hope that's okay.
So my loves
Following the order ROYGBIV, here are my picks:
********************************************************************
RED: Vivid Rose from the Maybelline Colorsensational Vivids collection is my go-to lipstick for the summer. Its a bold hot pink with rosy undertones. Pigmentation is fantastic, it applies beautifully, wears very well and doesn't settle into the lines of my lips.

 |
| With flash |
It has a creamy finish but without that gooey feeling on your lips and also doesn't feel dry throughout the day, as many lipsticks tend to.
The colour stains your lips in the most flattering way, giving you the ultimate fruit punch pout. It's a perfect accessory for a night out!
Drugstore lipsticks are really coming a long way
TIP: As long as you keep the rest of your makeup minimal, don't be afraid to rock a bright lipstick.
Orange: Coral is one of those colours that was just made for summer and will flatter just about anyone.
It looks very overwhelming in the compact but when applied, it gives you the most natural flush that really brightens up your complexion. Stunning pigmentation, works hard to keep your oiliness at bay in the heat of summer while also keeping your colour fresh throughout the day. On my oily skin, it lasts 6-8 hours before I have to reapply.
Definitely a staple in my collection <3
Another orange favourite is this body mist from Bath and Body works that I got last year. A wonderful floral and feminine scent, with lovely gold shimmer that makes you sparkle in the sun. The packaging is super cute. I just wish it wasn't limited edition.
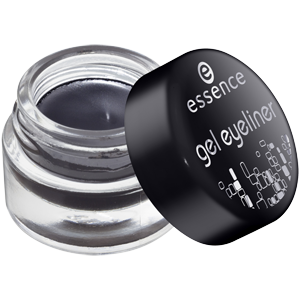
Yellow: Loveeeee this product! Makes any eye make up look SO glamorous. It retails for $16 but for the difference it can make, its well worth the price. A liiiiiiiiiiiiiitle goes a LONGGGGG way, you only need a drop of it to get just the perfect amount of sparkle. When the light hits it, it is absolutely stunning!
I'm especially lazy with my make up routine during the summer time cause of the heat, so anything that makes it look like I've put hours worth of effort into my makeup when I really haven't, I'm down for it and this does it for me. Its eye catching without looking cheap or tacky. Highly concentrated fine glitter that has the consistency of water but not the kind where it rubs off all your eye shadow in the application process. Can be worn alone or over a shadow.
I do prefer the original liquid lustre (a beautiful diamond/silver shade) over this as it goes with every single eye look you do but this really brings life to any gold eye shadow. I can't rave enough about these liquid lustres. GET ITTTT!! It's a sparkle junkie's dream <3
 |
| With flash |
GREEN: These two go hand-in-hand for me as its part of my make up removing process.
I've tried so many different brands of eye make up remover, even high end and I always come back to this one from L'oreal.
It's an oil-based eye makeup remover so it easily takes off waterproof mascara, eye liner, etc, without irritating the eye. I use it with a cotton ball and in just a few gentle swipes, most of my eye makeup is dissolved. I cannot go a day without this product, it's my fifth bottle and I've already got a back up.
Very affordable. Conditioning of lashes is an added bonus and I have noticed a difference in the way my lashes look.
Say yes to cucumbers towelettes are my favourite facial wipes! Does a great job removing all my make up, feels clean without stripping my skin of moisture and it smells delightful. Its especially refreshing and soothing during the summer time when its super hot out.
I've tried make up wipes from the CVS brand, Neutrogena, Simple, Ponds, and I prefer this over the rest. I've gone through packets of these already! Will repurchase when I run out.
BLUE: Where has this been all my life!?! I was a long time user of the Crest Whitening strips and it did work but it was just way too expensive.
During the school semester, I go through 2-3 cups of coffee and noticed my teeth were starting to look yellow and gross. But then one day I stumbled across this product at Rite Aid and despite my skepticism (I had heard nothing about this brand before) I decided to try it and I am oh so glad I did because this does the job for me, for a much cheaper price.
I honestly didn't think it would do anything but now I wish I had taken before and after pictures to show you what an incredible difference it has made. The first time I used it, I didn't notice much of a difference so I continued to use it until one day I noticed my teeth in a picture (taken with flash) and saw how white they looked! I was impressed. I like to keep it on for 15 minutes instead of the suggested 5 minutes.
Great product with fast results, doesn't make my teeth sensitive. I feel more confident about my smile now and I find that whiter teeth just make my whole face seem brighter.
INDIGO: I'm using this colour very loosely here, but the packaging is somewhat of an indigo, so I hope that's not cheating lol ._.
 |
| Image taken from Allure Cube |
I'm all about highlighters and glowing skin in the summer time and so a highlighter was a necessary addition to this tag. Its a beautiful palette of shimmery pale pinks that work as fabulous highlighters, blush and even eye shadows.
The packaging looks so chic and the powder itself feels extremely high quality. Its fine texture allows it to blend seamlessly into the skin and adds a lovely lit-from-within princess glow to the face without being overly shimmery. I'm dying to get my hands on Amber Diamond.
VIOLET: If you saw my May favourites post here, you'll know exactly why I love this product! Super inexpensive but effective treatment for dry, damaged hair.
PINK: I didn't have to think too hard for this one at all, definitely my Beauty Blender! I love love love this stuff. I didn't understand the hype about it in the beauty community until I tried it out myself. I was looking for new ways to apply foundation in the summer time where I wanted a lighter touch but was very skeptical about spending $20 on a sponge. In the end, I bought it because my priorities are high and I know what really matters in life :D but really though, I'm hooked!
My friends, say good bye to cake face for good! This sponge gives you THE most flawless airbrushed finish that looks like skin but with great coverage. Don't get me wrong, I still love my foundation brushes but the Beauty Blender reigns supreme for me. Besides, you just can't beat pink :) Everyone needs this in their makeup collection! Worth the hype
The bottom round part of the beauty blender is used to apply foundation on larger areas of your face while the pointed end is helpful for those hard to reach areas like the corners of your nose and under the eyes.
I've heard a few people complain that it absorbs your foundation, but I've found that the best way to avoid that is to smear your foundation on your face and then use the BB to blend it out instead of dipping your BB directly into your foundation and then stippling it on.
MULTICOLOUR: I have two fashion faves that fit this category. I adore them cause they're so super cute and summery.
The first one is a bracelet from
Forever21 that I picked up few months ago in the most random location at the store. It was really inexpensive ($6 something) but it looks like it'd be worth so much more.
It's a very pretty bracelet with good construction and artistry. It has good weight to it too so it doesn't feel cheap. The bracelet has four gorgeous pastel shades that go in a crisscross/braided design, and the contrast with the gold rim is so pretty. Its got a ton of gems that sparkle and its clarity is more than I expected from a Forever21 jewelry collection so overall, I'm super pleased with it.
Lovely to look at, lovelier to wear! Even my mom adores it :)
The second multicolour item is this tote bag I picked up from
Target recently. It is well made, the print is absolutely lovely, great colours for the summer time and the price point is incredible. Its the perfect size bag for a girl who has a lot to carry, but does not like a big bulky bag.
The bag retains its shape and stays upright when you set it down and has sturdy handles, which I love. There aren't any exterior pockets but there is plenty of space and corner pockets inside to stow small things, so while it would have been nice, this wasn't a deal-breaker for me.